Heroku-like Deployment on your Raspberry Pi using Piku
Introduction
If you’ve used Heroku in the past you probably enjoyed the simplicity of deployment when using the platform as a service (PaaS). But if you’re like me, your projects are too small to justify paying for the service. Perhaps you’ve thought to yourself, “I wish I could deploy my app to a self-hosted server.”
While looking for a self-hosted PaaS the two options that I thought would be the best fit were Dokku and Piku. Dokku is docker powered and super easy to deploy and set up, but it’s quite resource intensive, at least as far as a Raspberry Pi is concerned, which is make desired host. Piku on the other hand is very lightweight, but since it’s not containerized and is dependent on your system packages, you may run into some snags when installing on systems that are not previously tested.
So which one to go with? Well for me Piku seemed like the clear choice. It’s lightweight and literally created to be a PaaS for ARM processors on Raspberry Pis. So in this tutorial I will walk you through setting up Piku on a Raspberry Pi.
Imaging the Raspberry Pi
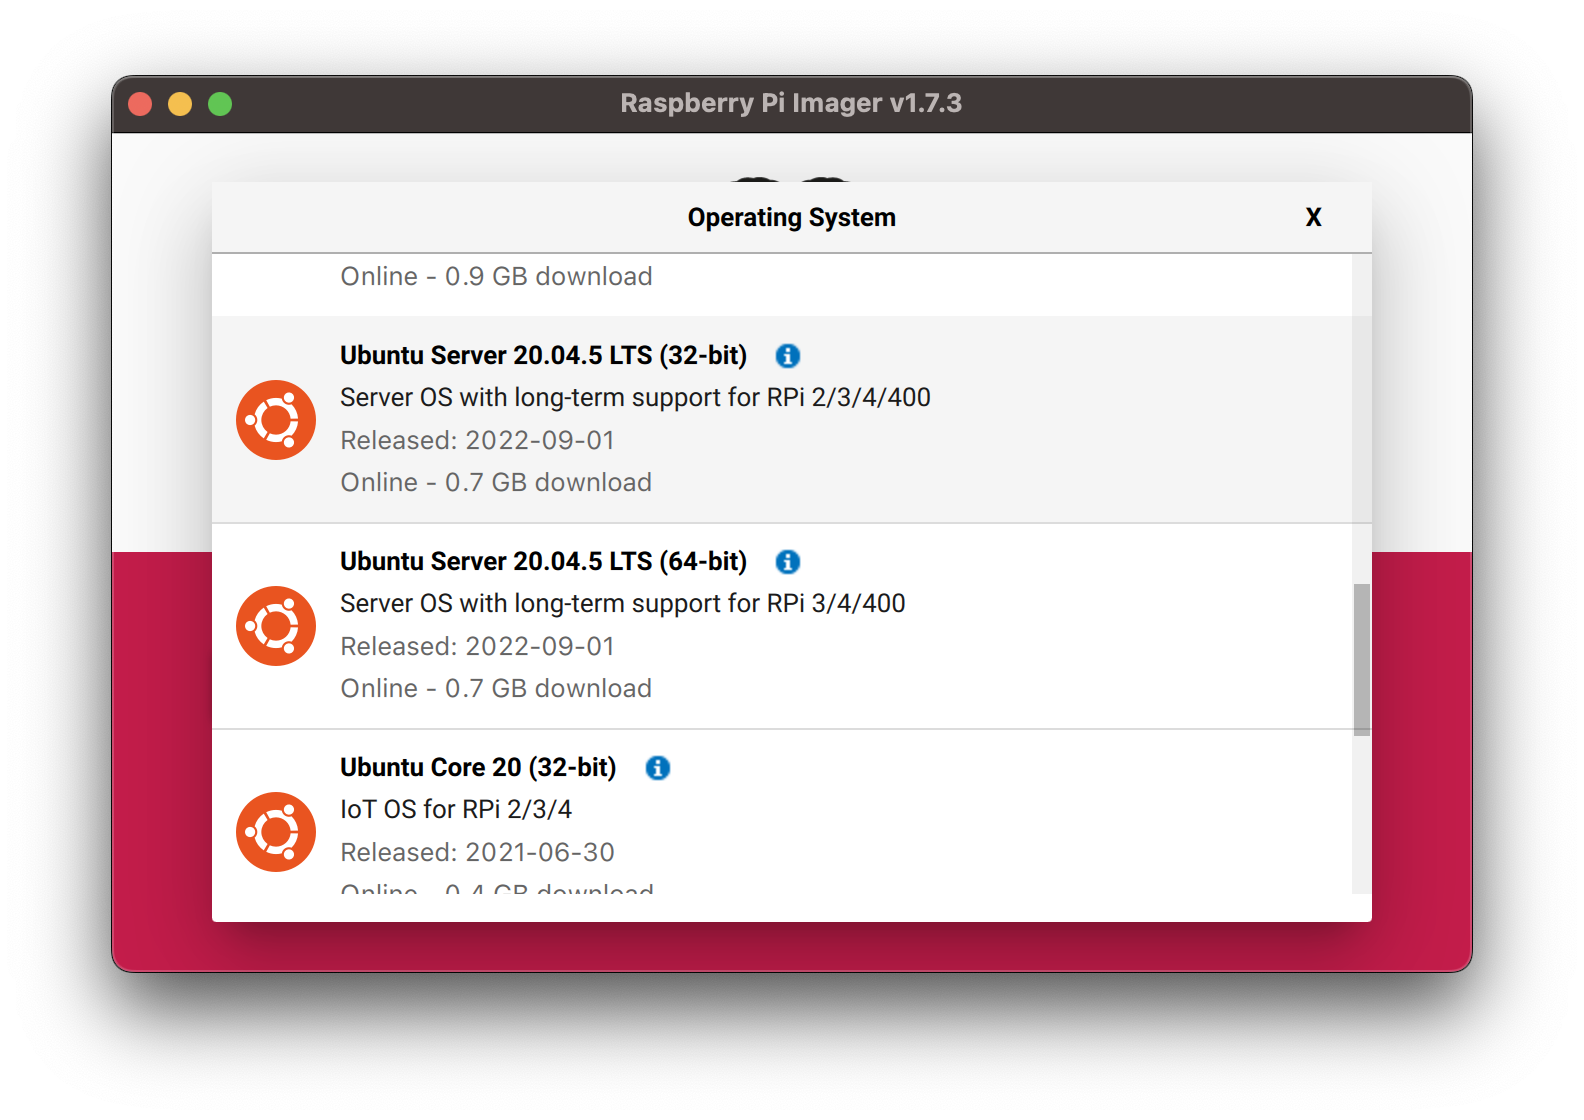
Following the directions in the piku/cloud-init repository, let’s start by imaging the Pi to run Ubuntu Server 20.04. In my case, I am using Ubuntu Server 20.04.05 LTS (32-bit). I’m using 32-bit because for this tutorial I am setting Piku on a Raspberry Pi 3 Model B v1.1. However, if you are using a more modern Pi, you will likely need the 64-bit version.
I used the Raspberry Pi Imager as seen below to image my SD card, but use what ever method you prefer. Once you have your SD card imaged, slap it in your Pi and connect power and network.
Setting Up Ubuntu Server
Now those directions in piku/cloud-init repo have two methods: fully automated and semi-manual. In this tutorial I will walk you through the semi-manual because when I used the fully automated, I was unable to have the ssh-key set up properly.
Let’s start by connecting to the Pi over SSH. You’ll need to figure out what the IP of your Pi is on your local network. For me, I log into my router and look at the connected devices to find that it is 192.168.86.132. So I will connect to my Pi using:
ssh ubuntu@192.168.86.132
The default password for a fresh install of Ubuntu Server 20.04 is ubuntu. Once you enter it the first time, you should be prompted to set a new password. Once you set the new password you’ll be booted out.
Next we need to get our SSH key onto the Pi so first let’s make sure we have one and if we do, note what type of key we have as we will need to know this for a later step. As you can see below, my key type is ed25519.
ls ~/.ssh
config  id_ed25519	id_ed25519.pub	known_hosts
If you don’t have an SSH key, you’ll need to generate one now.
Now that we have our SSH key we will copy it over to the new server using the command below. When prompted for a password use the one you just set a moment ago.
ssh-copy-id ubuntu@192.168.86.132
If successfully copied over you should be able to connect to the Pi without providing a password. This is important because later on a piku user will be created and it will not have password login enabled. Instead, the SSH public key from the ubuntu user will be copied to the piku user during the installation. The piku user is the user that is used to run the Piku instance and run the Piku commands. If you do not set the piku user up properly with the SSH key, you will not be able to issue the Piku server commands.
Let’s log in to the Pi again:
ssh ubuntu@192.168.86.132
You should have been able to connect without providing a password and should now see: ubuntu@ubuntu:~$.
Installing Piku
Following the directions in piku/cloud-init, let’s run the following commands:
sudo rm -rf /var/lib/cloud/instances/nocloud
cd /boot/firmware
sudo mv user-data user-data.original
Here I differ a bit from the commands you see in the config, but that’s because those commands only make sense if you’ve already downloaded the yaml config file to your Pi already. In our case, we’ll just create the file and paste in the contents.
sudo nano user-data
With the nano editor open, paste in the contents of cloud-init.yml, then exit and save.
If you noted earlier that you have a key type of ed25519, then run the command below to replace the key name in the user-data file. If you are using the rsa key type, you should skip the command below.
sudo sed -i 's/id_rsa/id_ed25519/g' user-data
We can also update the timezone as appropriate.
sudo sed -i 's=Europe/Lisbon=America/Chicago=g' user-data
Now it’s time to reboot so that the settings we placed in user-data will go into effect.
sudo reboot
Your SSH connection will be terminated and your Pi will reboot. Now we have to wait for the Pi to install all the packages needed for Piku. This will take a fair bit of time. You’ll know when things are ready when you are able to remote into the Pi using the piku user: ssh piku@192.168.86.132 and it should not ask for a password.
In the meantime, we can set up the Piku Helper which is a toolset used to manage the Piku instance once it is set up.
Installing Piku Helper
If you are using linux, follow the directions in the main Piku README. In my case I am using MacOS, so I used the following command:
sudo curl https://raw.githubusercontent.com/piku/piku/master/piku > /usr/local/bin/piku
Optionally you can use the command below to add a line to your ~/.zshrc that specifies the IP so that you don’t have to type it in each time:
echo 'export PIKU_SERVER=piku@192.168.86.132' >> ~/.zshrc
Then you can update your environment by running:
source ~/.zshrc
Using Piku
Now we should be able to use piku commands from our local host. If the server has had enough time to set up we can try the following:
# View installed apps (there will be none on a fresh install)
piku apps

# Show piku help
piku
However, if it asks for a password, Piku is still not ready. At this point, be patient grab a coffee, go for a walk, this may take a while. For me it took about an hour, but the newer and more powerful the Pi, the faster compiling will go. If you want to watch a pot boil, SSH in using the ubuntu user and watch the progress using sudo tail -f /var/log/cloud-init-output.log. The last part of the install will be to reboot, so that will let you know things are ready.
Adding Your First App
Once Piku is done installing, let’s add the Piku monitoring app as it will be a good example of how to add an app and also worth having for monitoring your Piku server.
First download the repository and place it on your local machine. Open a shell in the git repository.
Before we install Piku monitoring though, let’s set up our server’s hostname. Log into the ubuntu user and run the following to set the hostname as you see fit, in my case I’m using pi. We’ll also install and restart the avahi-daemon so that we can reach our server at pi.local.
# Run on remote host
sudo hostname pi
sudo apt-get install avahi-daemon
sudo systemctl restart avahi-daemon
Back on the local host, let’s follow the directions in the README to add a git remote and push it to the Piku server.
# Run on local host
git remote add piku piku@pi:piku-monitoring
git push piku main
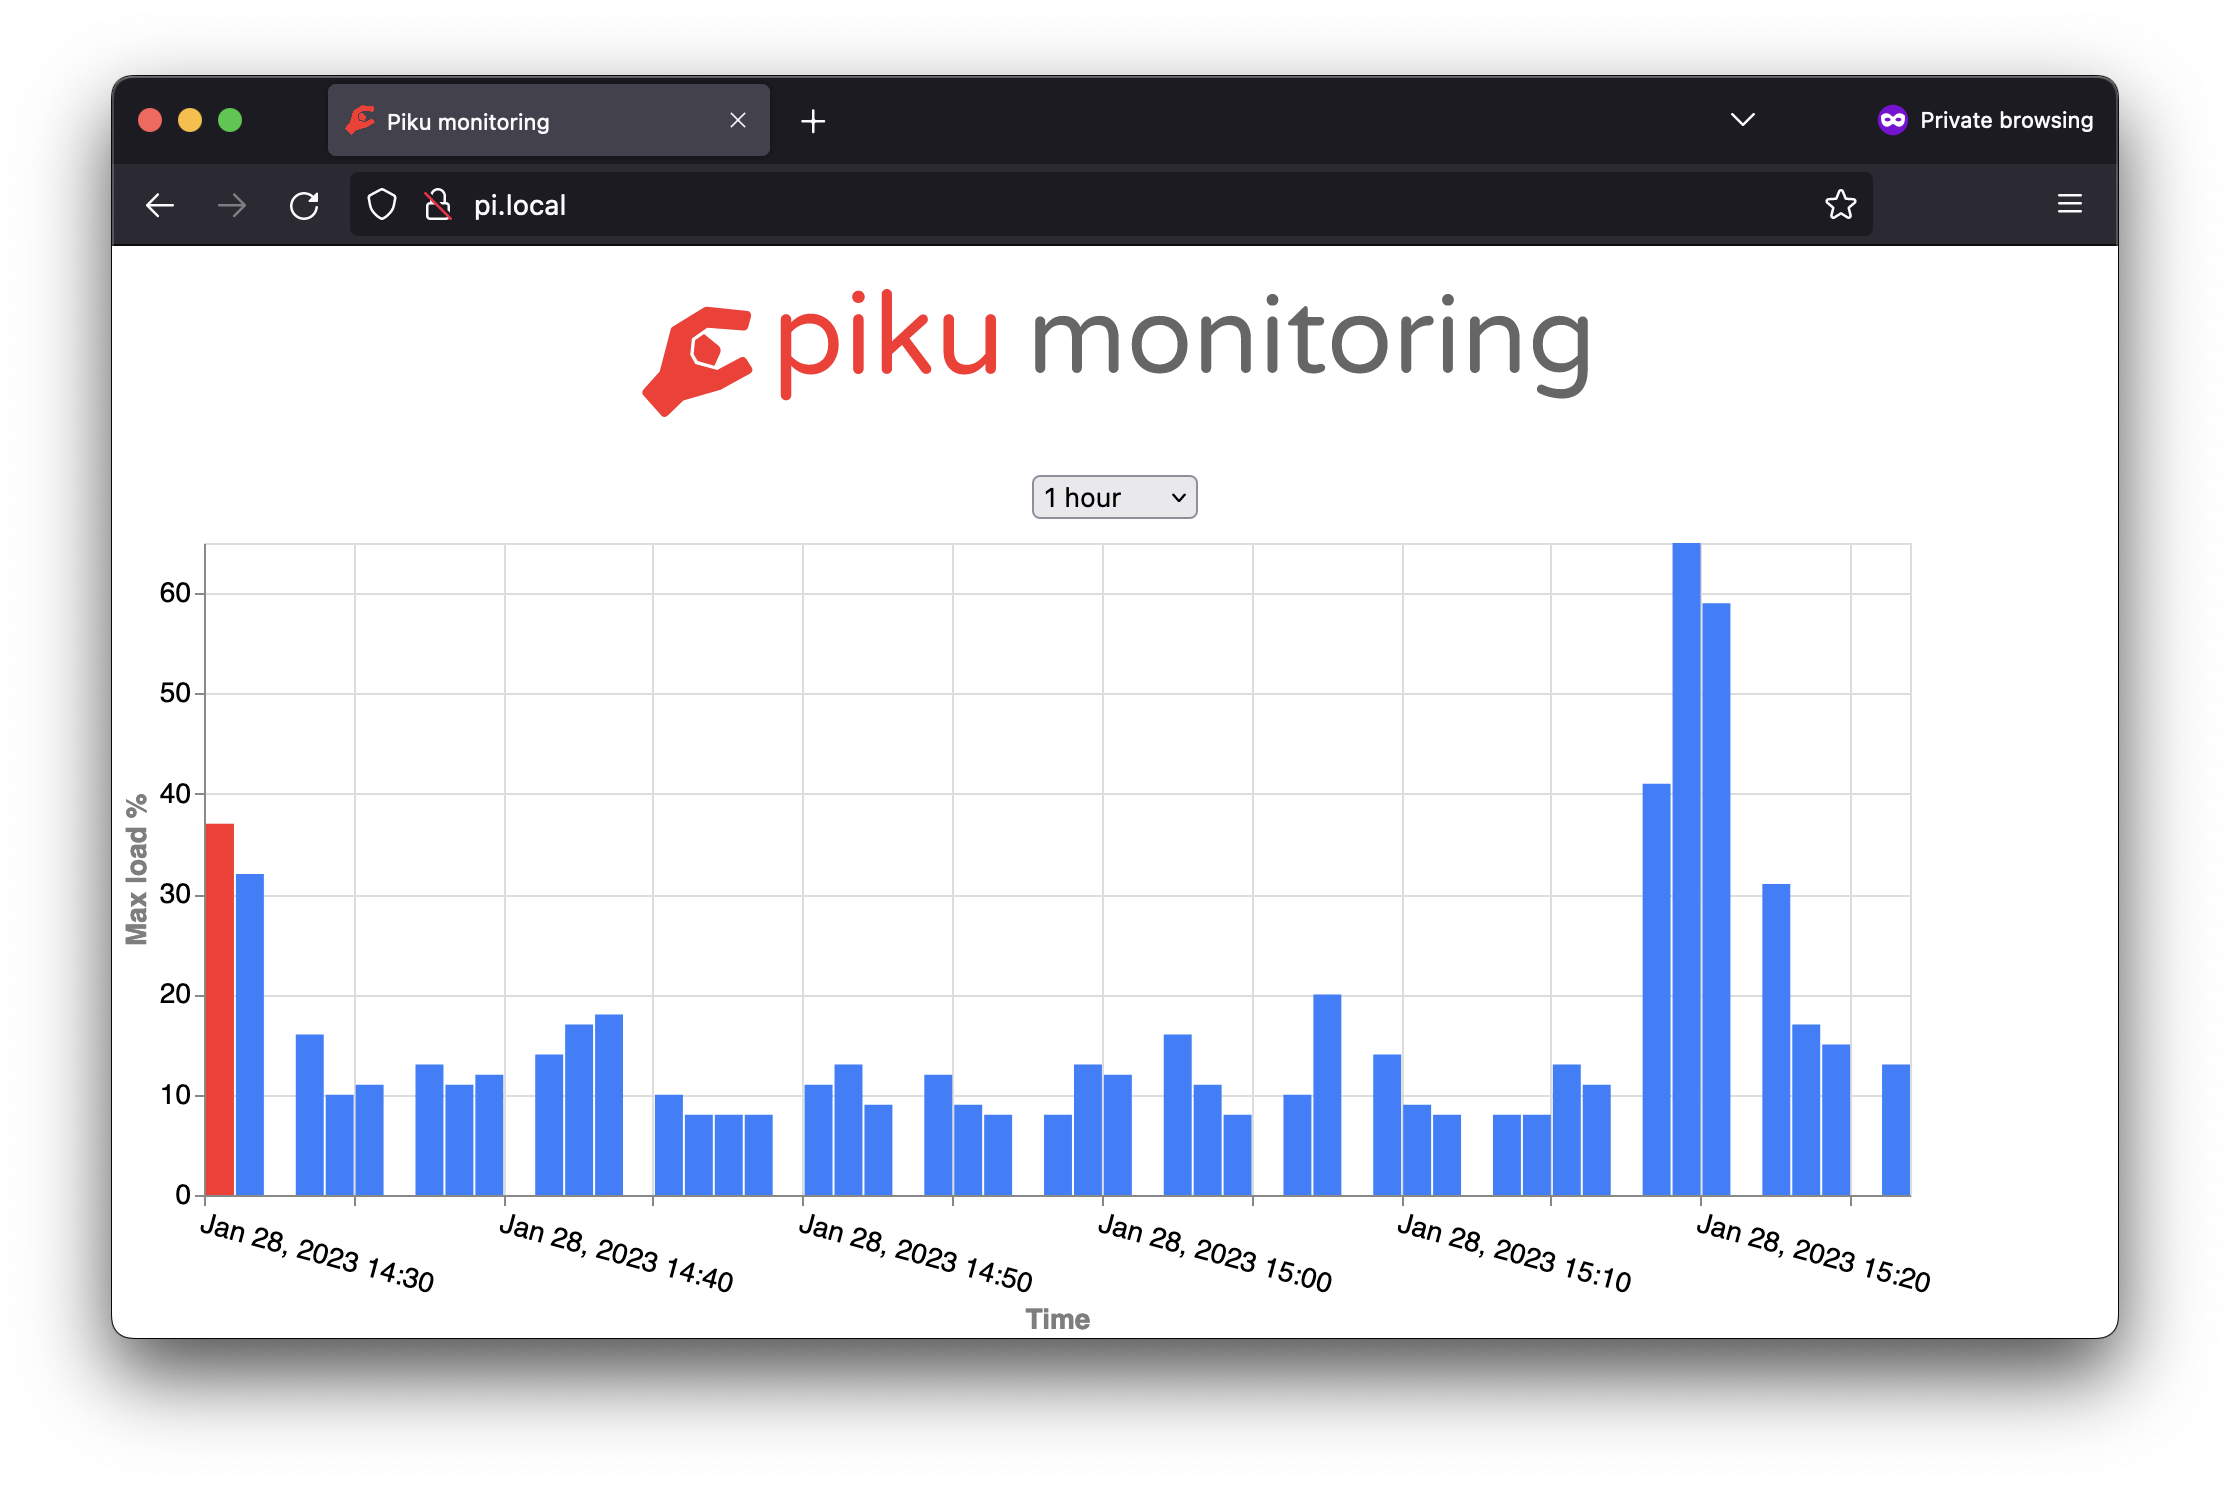
piku config:set NGINX_SERVER_NAME=pi.local
Now visit pi.local, and you should see something like the image below.
Conclusion
That’s it! You should be good to go with a solid start. Now it’s time to deploy your own apps. GLHF!
PS: You’ll notice some of the github links I have included point to a specific commit. This is because I wanted to show you want the repo looked like when I wrote this post to make sure you have the same experience. Newer commits may or may not work.