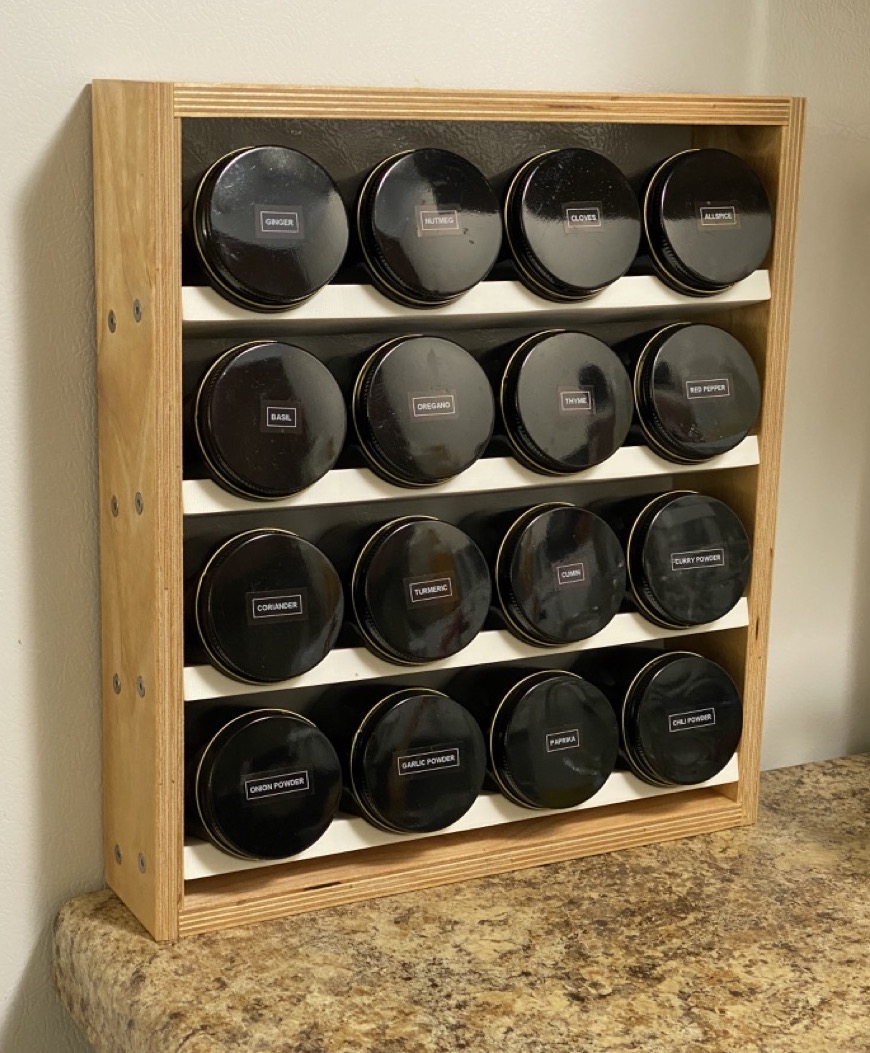
DIY Spice Rack Using 3D printed Shelves and a Wood Frame
I built a spice rack. If you want to do the same, here is what I did in case you’d like to do similar.
Materials
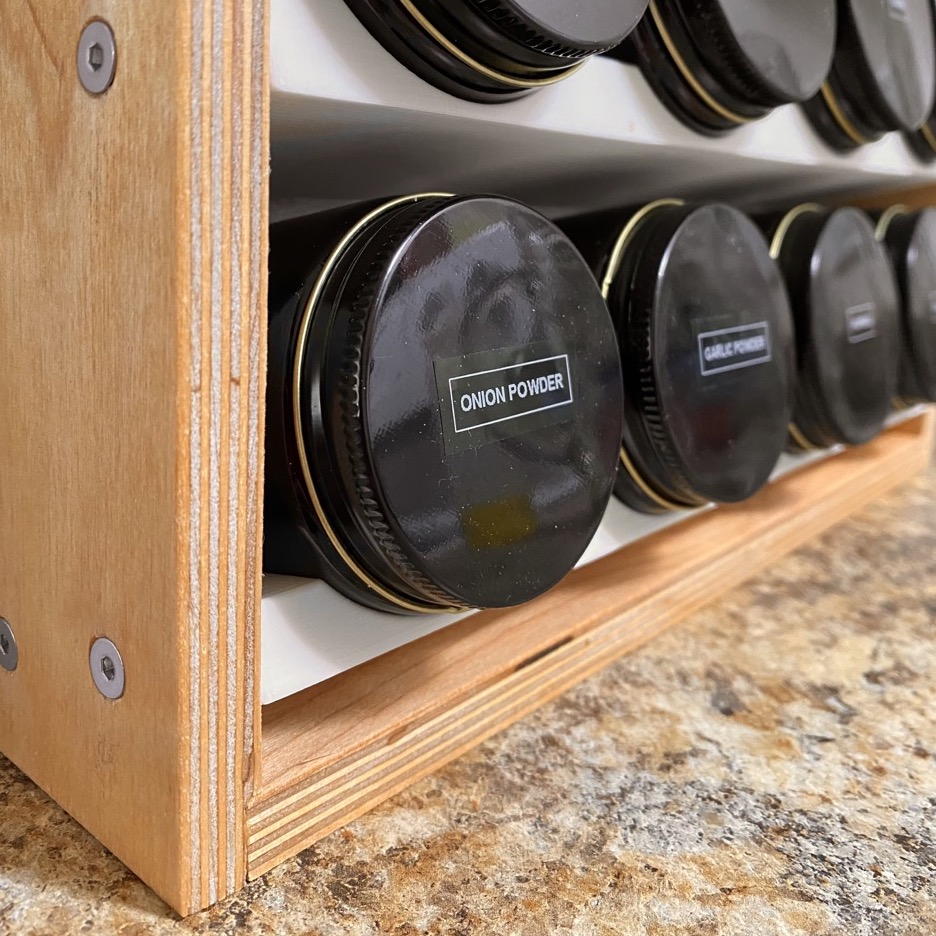
Jars:
I bought from Berlin Packaging, but I realized later that these jars are common and can be found on Amazon. You can also find them in blue, green, and clear glass. Jar tops can be plastic and metal, as well as different styles and colors. Below is what I got.
| Item | Quantity | Item Price | Item Total |
|---|---|---|---|
| 4 oz Amber Glass Straight Sided Jars (Cap Not Included) (Qty 12) | 2 | $6.63 | $13.26 |
| 58-400 Black Metal Threaded Caps (Pulp & Vinyl Liner) | 24 | $0.30 | $7.20 |
PLA Filament: Just use what ever you want, I used Polymaker PLA+ Satin White.
Wood: The measurements I will provide assume 1/2in plywood, adapt as necessary to your wood choice.
Hardware: M4x16 Flat Head Screws. Buy wherever, they should look like this. Feel free to change up the hardware, but the 3d model is designed for M4. I found that my print settings left the hole too large for thread engagement when the holes were printed sideways. YMMV.
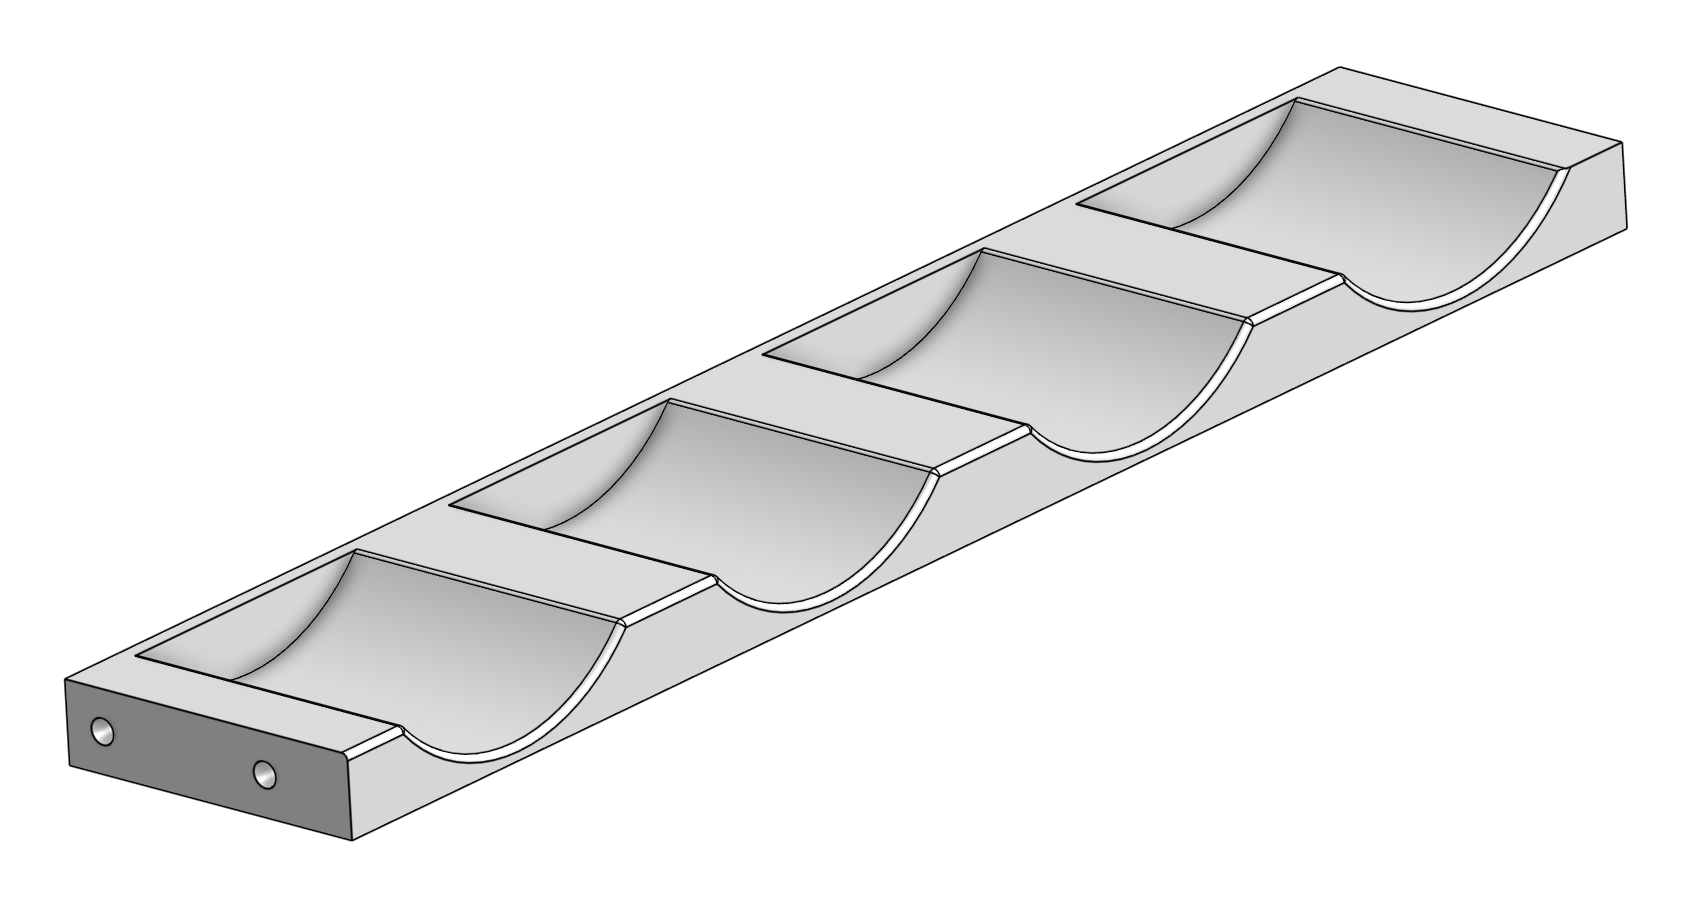
3D Model
The source model in OnShape can be found here. The design is somewhat parametric, so you can customize to your use case a bit, for instance you can change the screw hole size.
If CAD isn’t your thing, check out the files on Printables.
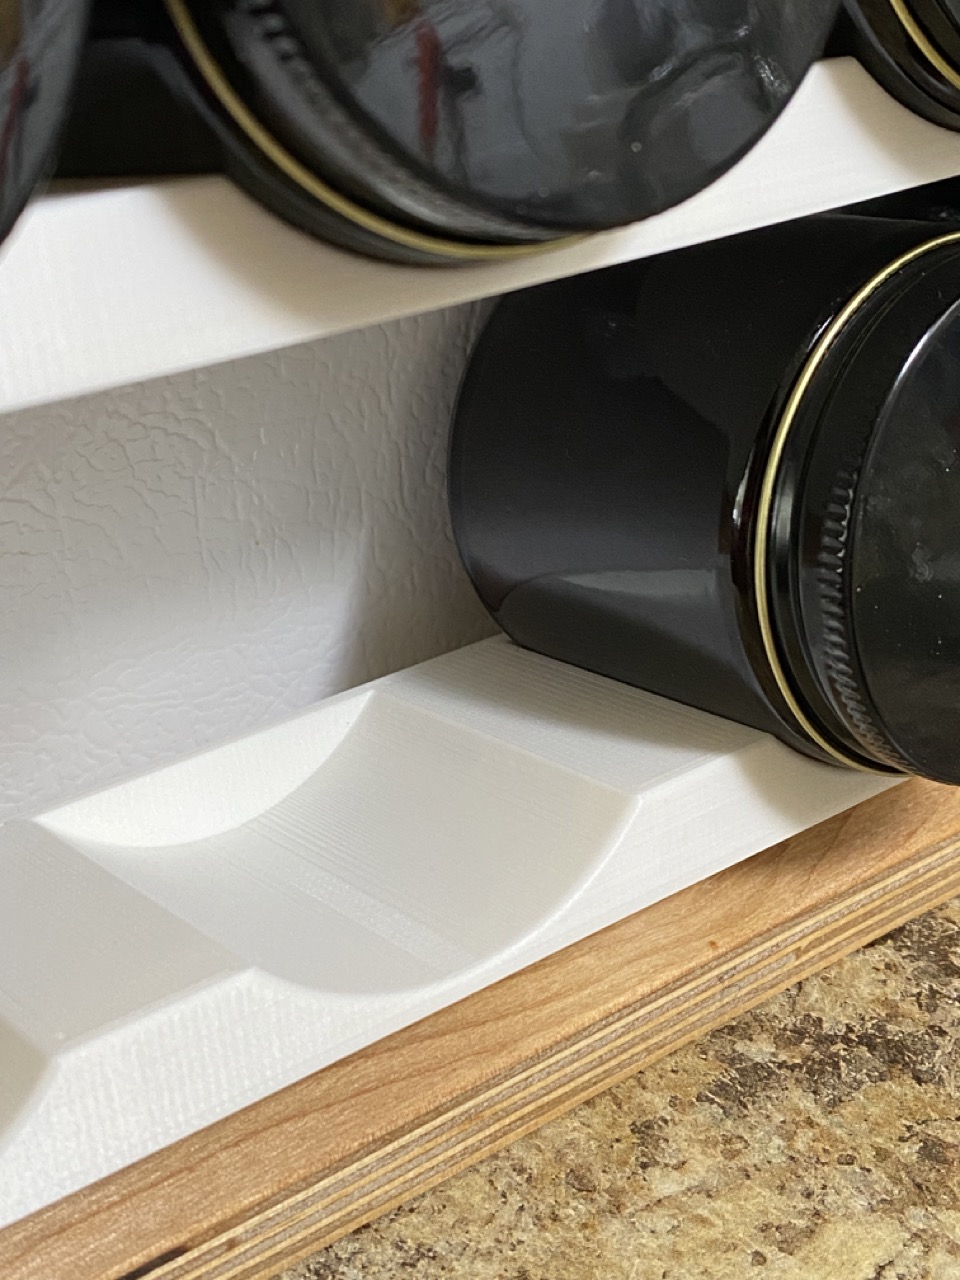
There are two templates included that can be used help you drill the holes in the right place without having to measure. One of them is shown below.
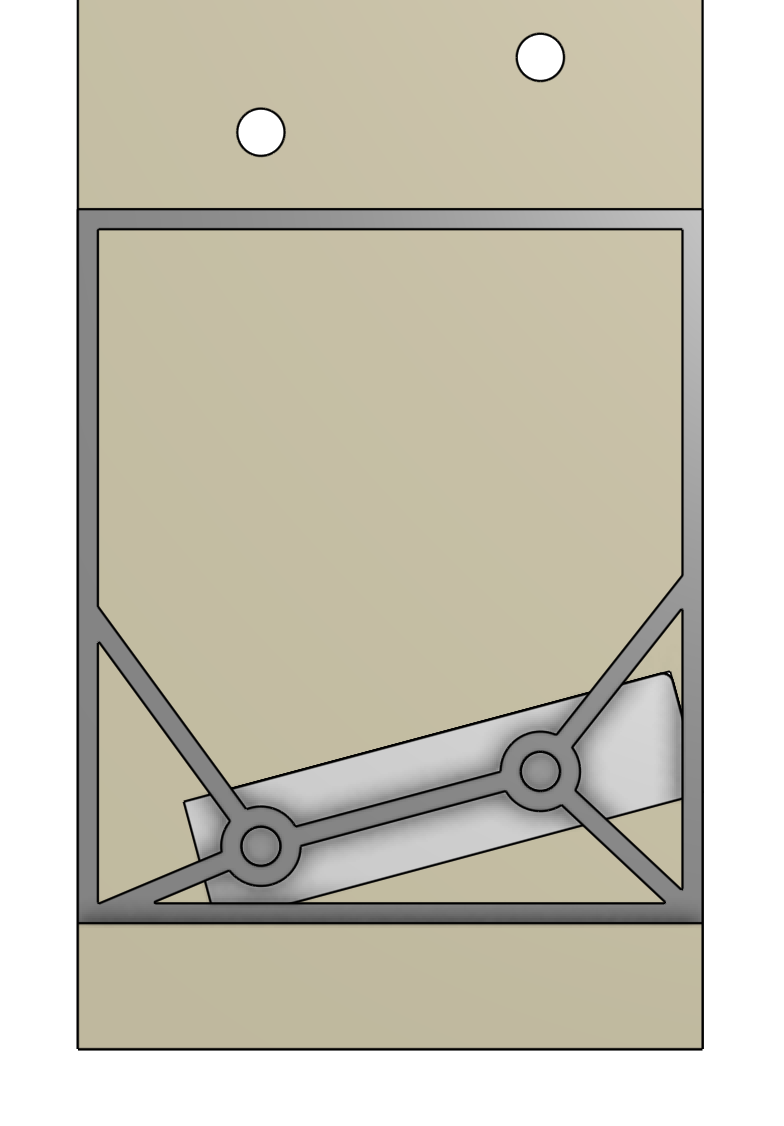
Because each shelf is angled, the clearance can be tighter than the very top shelf which is flat. That’s why you will see two templates; the larger one being the one used for the top shelf. Technically you can get away without the larger template if you use the shorter one starting at the bottom and working your way up.
Wood Frame
The last piece of this project is the frame made from 1/2in plywood. Technically I modeled frame (see the OnShape or Printables links), so you could use a CNC to cut out the pieces. I suppose technically you could print the frame from PLA too if you have a big enough print bed.
Personally, I just used conventional power tools (table saw and drill press). Below are the dimensions for the wood frame. Print out this PDF to take to the workshop.
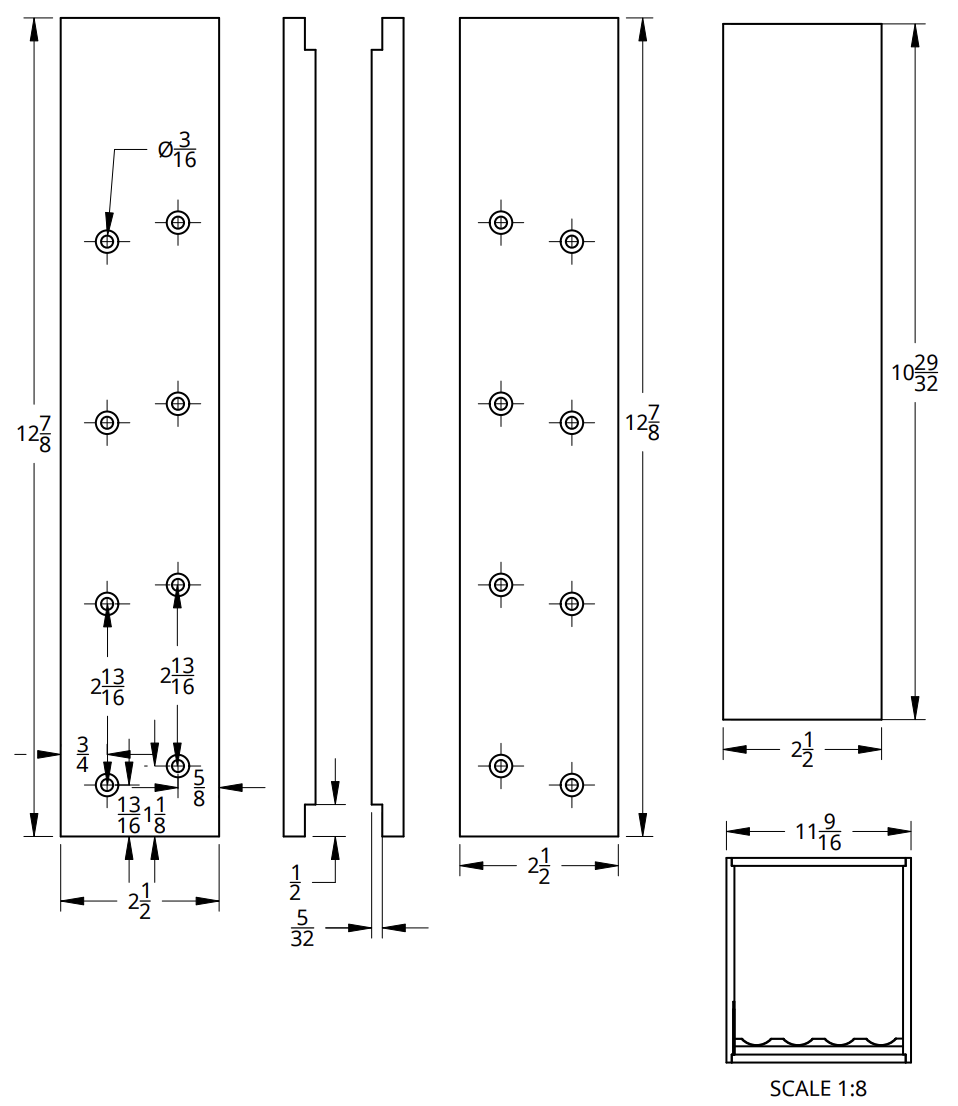
I would recommend cutting the top and bottom pieces larger than needed, then using the printed shelves as a reference to slowly cut down the top/bottom pieces until the shelves fit perfectly.
Glue should be all you need to join the frame securely, but this will require clamps.
I finished my frame with Danish Oil, use whatever you prefer.
Finished Spice Rack